


ProfessionalCommunity Edition
Getting started with Burp Intruder
-
Last updated: June 8, 2026
-
Read time: 4 Minutes
Burp Intruder is a powerful tool for performing highly customizable, automated attacks against websites. It enables you to configure attacks that send the same request over and over again, inserting different payloads into predefined positions each time. Among other things, you can use Intruder to:
- Fuzz for input-based vulnerabilities.
- Perform brute-force attacks.
- Enumerate valid identifiers and other inputs.
- Harvest useful data.
The best way to understand how Burp Intruder works is to see it in action. You can follow the tutorial below to launch your first Intruder attack.
For more detailed information about the features and attack types of Burp Intruder, please see Typical uses for Burp Intruder.
Tutorial
In this tutorial, you'll learn the basics of configuring a simple Intruder attack using one of the deliberately vulnerable labs on the Web Security Academy.
Step 1: Access the lab
Open Burp's browser, and use it to access the following URL:
https://portswigger.net/web-security/authentication/password-based/lab-username-enumeration-via-different-responsesClick Access the lab and log in to your PortSwigger account if prompted. This opens your own instance of a deliberately vulnerable blog website.
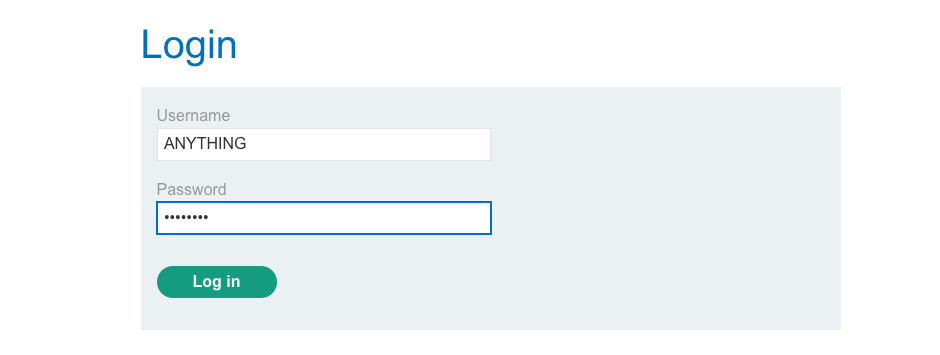
Step 2: Try to log in
Click My account, then try to log in using an invalid username and password.
In Burp Suite, go to the Proxy > HTTP history tab. This shows the requests you have made in Burp's browser since opening it.
Find the POST /login request. Highlight the value of the username parameter, then right-click the request and select Send to Intruder.
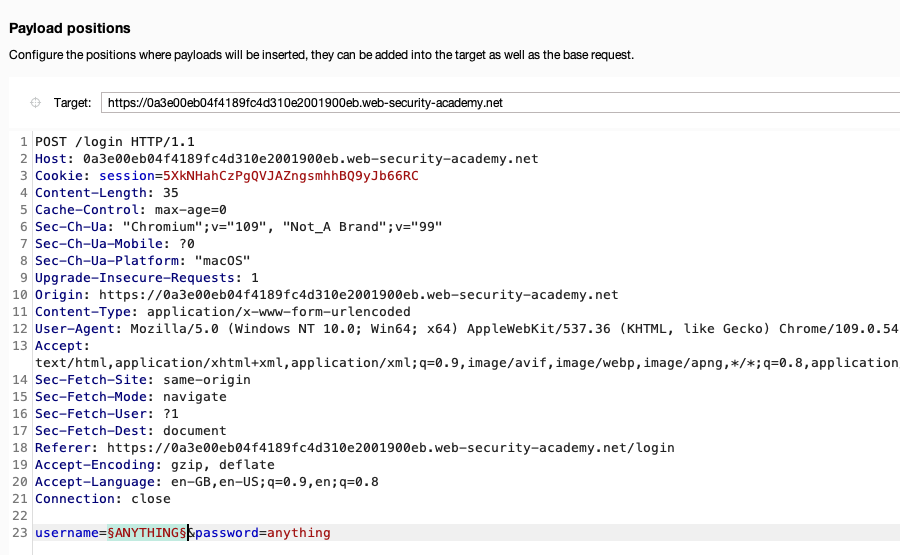
Step 3: Set the payload position
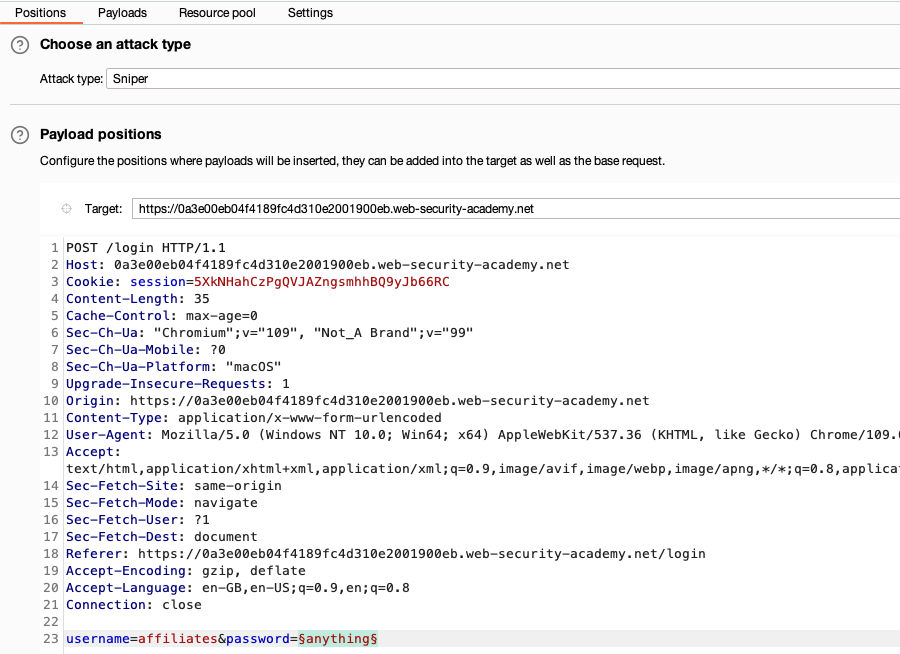
Go to Intruder. Observe that there is now a tab displaying the POST /login request. We'll use this as the base request for our attack.
Notice that the value of the username parameter that you previously highlighted is now marked as a payload position. This is indicated by the § characters at the beginning and end of the value. Burp Intruder will insert payloads at this position during the attack.
Step 4: Select an attack type
At the top of the screen, you can select different attack types. For now, just make sure this is set to Sniper attack.
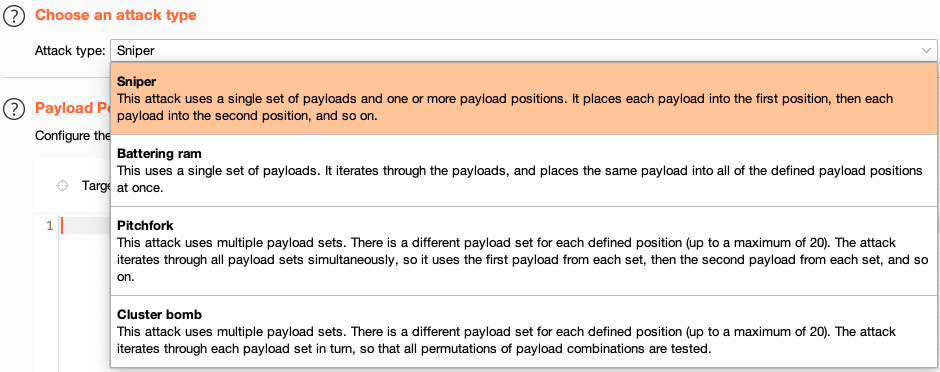
A Sniper attack inserts a single set of payloads, one by one, into one or more positions within the request.
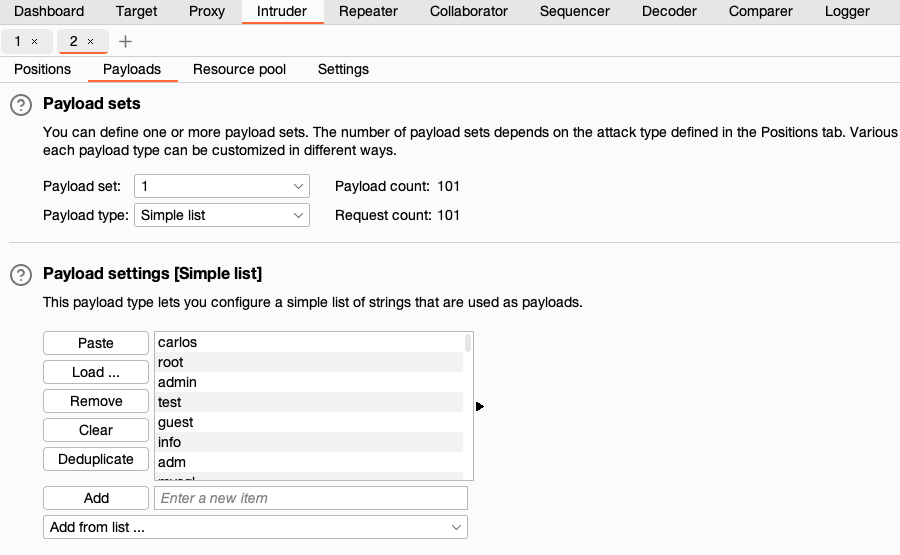
Step 5: Add the payloads
You now just need to configure the list of payloads that you want to use. For this demonstration, we'll try sending the request with different usernames to test how the login mechanism behaves.
Copy the following list of candidate usernames:
In the Payloads side panel, leave the Payload type set to Simple list.
In the Payload configuration field, click Paste to add the copied usernames to the list. Notice that the
Payload count and Request count update to 101. These values reflect the number of payloads added and the requests the attack will send.
Step 6: Start the attack
Click Start attack. This opens a new attack window in which you can see each of the requests that Burp Intruder is making.
If you select one of the entries in the table, you can view the request and response in the message editor. Notice that the username parameter contains a different value from our payload list in each request.
Step 7: Look for any irregular responses
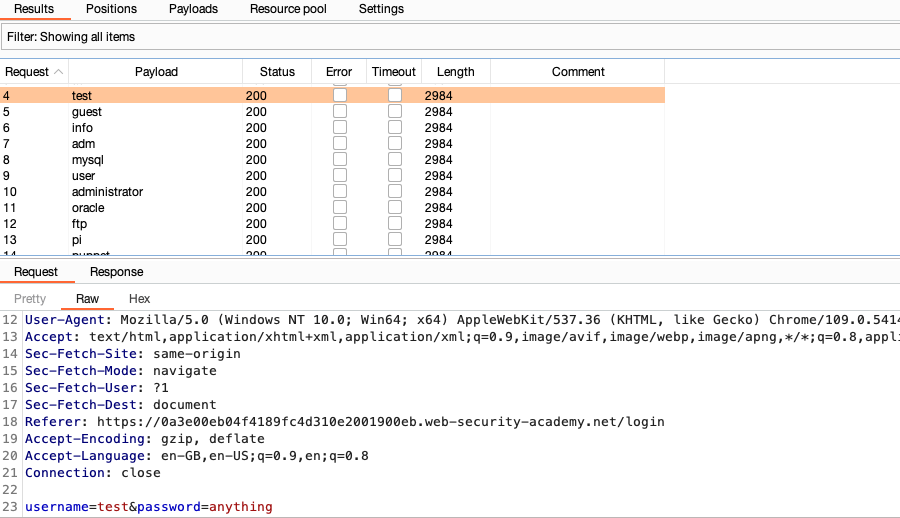
The attack window contains several columns displaying key information about each response.
Wait for the attack to finish, then click the heading of the Length column to sort the results. As you can see, one of the responses is a different length.
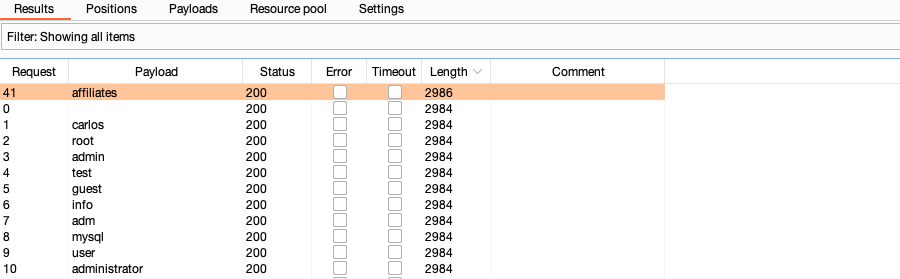
This difference in response from the server is worth further investigation.
Step 8: Study the response
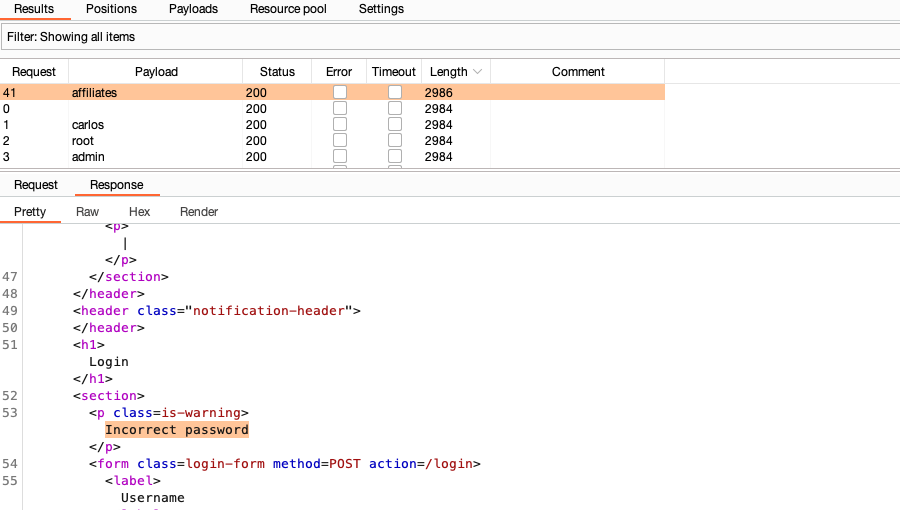
Select any request from the list to display it in the message editor.
Studying the responses, notice that most contain an Invalid username error message, but the one with the different length response has an Incorrect password error message.
This different response strongly suggests that this username might be valid in this case.
What next?
Now that you have a potentially correct username, the next logical step is to try to brute-force the password.
Try repeating this attack, using the username you have identified and this list of candidate passwords.
You can view the complete solution to the lab here.
Learn more about Burp Intruder
You have now learned how to use a Sniper attack against a single parameter.
- To learn how to configure an attack in more detail, see Configuring Burp Intruder attacks.
- To learn how to use Burp Intruder for a range of attacks, see Typical uses for Burp Intruder.
- To learn how to use these attacks against realistic targets, see Authentication vulnerabilities on the Web Security Academy.